Halloween Makeup


The first thing we did for the halloween makeup was learn how to make scars and cuts. You take a kleenex and peel it in half to make it thinner. Next you roll it up and cover it in liquid latex. I left it to dry overnight and then the next day I painted it with foundation, eye shawdow, blush, makep paint and fake blood. It ended up looking super real and gross. I loved it.


This liquid latex creation was harder to make. I started by using liquid latex and kleenex to make a circle and let it dry over night. Next I used more liquid latex to stick it onto my hand. I painted it with foundation and makeup paint. Then I applied eyeshadow and fake blood. I broke a pencil in half and stuck itt in. It looked really good. Although it only stood up by itself for about 7 seconds atleast i got a picture. Also after I took it off my hand i put it on finger and it looked like it was missing so I kept it on for a while.


Today we had Ms.Boucher in to teach us about makeup (specifically foundation). First she started off by going through different colors off foundation before we all agreed on which color suited Emily. From there she put on powder, concealer, bronzer, blush, eyeshadow, eyeliner and then lip gloss. Then we had to go try to find our own foundation color. I tried a bunch of different colors and kinds and I finally found one that blended nicely into my skin.
Safety and Sanitation When Using Makeup
1. When using any powders in a palet use a paper towel and wipe the powder after using it to prevent germs from speading to other people.
2. For lipsticks place a small piece of lipstick on a seperate container or dish, from there apply the lipstick with either a Qtip or brush.
3. After using a pencil eyeliner sharpen it or disinfect it with rubbing alcohol.
4. Use reusable mascara wands for mascara, so no one uses the same one.
2. For lipsticks place a small piece of lipstick on a seperate container or dish, from there apply the lipstick with either a Qtip or brush.
3. After using a pencil eyeliner sharpen it or disinfect it with rubbing alcohol.
4. Use reusable mascara wands for mascara, so no one uses the same one.
The Color Wheel


Today in class we talked about the colour wheel. The colour wheel is very important for makeup because it can help you pick out eye shawdow, lipstick and blush colours that go with your eyes, lips and skin. For example since I have green eyes I usually go for a violet or red violet eye shawdow color to enhance them. However if i wanted to bring out the blue flecks in them I would go for more of a brown or subtle orange. After this lesson it really made me think. All my life I thought pink lip colors were the only colour that looked okay on me bu after looking at the color wheel I went home and tried a red lip stain and I really loved the way it looked. I will really be using this colour wheel more often to pick out makeup.
Colour Wheel Inspired Eye shadow
The first thing we did today was watch Ms.Boucher do a eye shawdow demonstration on Emma. Since Emma has blue eyes she went with more orangge colors and it really made her eyes pop! I think this looks really good on her and I even heard Emma say she was going to try and buy these colors so she can do it at home.


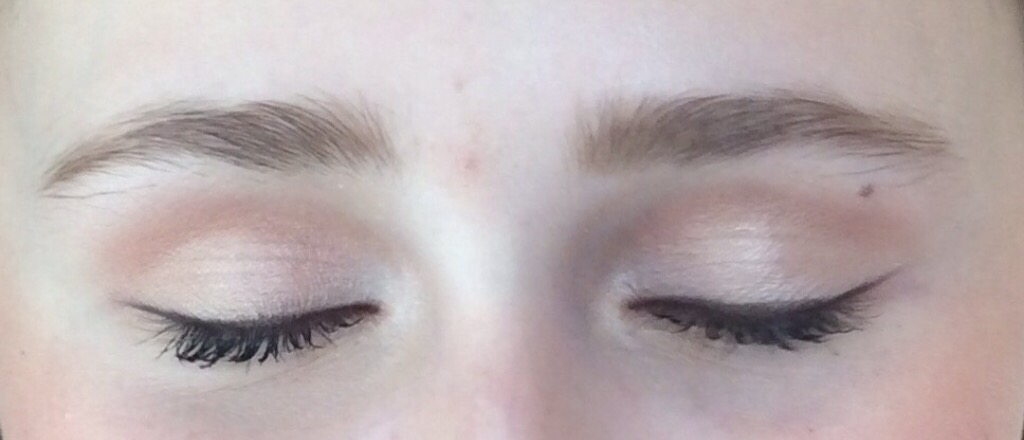
After Learning about the colour wheel I decided to try ot a violet eyeshadow with my green eyes because those colours are almost accross from each other on the color wheel. I think even though it is very light the violet did make my eyes pop! First I started with a really (really) light violet under my brown bone, then I used a darker purple in my crease and finally I finished off with another light violet on my lid. Although I liked the way it looked I thought it needed more so I added winged black eyeliner and a plum colored lip tint. I really love this look and cannot wait to try it on other people. If I had to change anything the next time I do it I would use darker colours and a primer.
First Makeup look


Today I did Caitlin's eye and lip makeup. We started out by looking for a tutorial on YouTube, since Caitlin has hazel eyes we decided to go with a brown smokey eye to give her a warm natural look around the eyes. I also suggested we try a bold warm red-violet lips which ended up looking really good. First I started by putting a light brown eye shadow in her crease, then I put a shimmery white below her brow, from there I added a darker brown on her lid and blended them all until we had the look we wanted. From there I applied a black pencil eyeliner and then mascara. For her lips I lined them with a red-violet lip pencil, applied some red-violet lipstick and finished it off with a red lip gloss (I couldn't find a red violet gloss). In the end I really enjoyed the look however if I could change anything I would add a primer first so the shadow would look more bold and if I had time I would put on foundation and blush.
Smokey Eye


Today Caitlin tried a smokey eye look on me and i'm really happy with how it turned out! I think she blended the colours really well and it looks super good. I think I will have to have her teach me how she did it...
Fairy Eye Makeup Look


Today in class we had a grade 12 come in and teach us two different makeup looks. The first one was her everyday look and the second one was what she did for Halloween, a fairy. I liked both looks but the fairy one I found really cool. She used a kleenex to create more of a sharp looking angle with her eye shadow instead of the normal soft/blended look. After hearing her say that the same look could be acheived with tape I really wanted to try it. That night instead of doing math or french (just kidding I did them) I dug through my old makeup until I found this palet. I started off by placing the tape starting from the side of my nose past the outer corner of my eyelid. I then applied the darkest blue to the outer corner and gently blended it in. I did the same thing on the inner corner of the eye but this time with green. I blended the two together in the center of my eyelid with an aqua colour. I then used a pearly white shadow starting from the top of the blue eye shadow all the way up to the bottom of my eyebrow (That is why it is sparkly). I used the same white colour directly under my lower lashes followed by a light blue. I applied black eye liner on my tight line. I finshed off the look bye outlining all the eyeshadow with a spakly eye liner and then applying mascara to both my upper and lower lashes. I then removed the tape. All in all I love the way it looks and I think it makes the different flecks of green and blue show up in my eye.
Day Look


Today I did a day look. I started by applying foundatin and then very minimal black eyeliner. Next I applied a light violet eye shawdow under my brow bone, a darker purple in my crease and a frosted light purple all over my eye then blended it out. I then finished the look with some light red blush and lipgloss.
Eyeliner and Night look


Today was super awesome! We had the makeup teacher in again to teach us how to do eyeliner and I was very excited. I did mine with an angled brush and black liquid eyeliner. I already had some eyeliner on from that morning on my tightline so all I did was thicken the top. Next I added the wing out tthe side. The right eye was pretty easy to do (however Ms helped me smooth it out after) but the left eye took a lot of work... I kept having too erase it and start over until finally I was happy with it. In all I love this look! I got so many compliments on it and i cant wait tto do it at home!
